


The WordPress dashboard allows you to perform most site maintenance tasks with ease but if you want to edit your child theme code or perhaps upload some files without having to log in to your WP dashboard, FTP or SFTP is the way to do it.
If you don’t already know, FTP stands for File Transfer Protocol and is a protocol that allows you to connect directly to the server on which your sites are hosted, in order to manipulate the files that make up each site. SFTP stands for Secure File Transfer Protocol and offers the same functionality as FTP but uses a Secure Shell (SSH) data stream.
The steps you will need to take to start using FTP or SFTP will depend on which hosting service you are signed up with. In this guide, you will find instructions on how to create a new FTP WordPress account with any host that uses cPanel, along with instructions for Kinsta, Flywheel and WPEngine.
Set Up FTP with cPanel

cPanel is a very popular Linux-based control panel for administering websites. If you are signed up with a host that uses cPanel, e.g. Siteground, you will find that an FTP account was created for you by default when you first registered. Default accounts are created for each domain or sub domain that you add to your hosting plan, which means if you maintain your own websites, you won’t need to set up a new account. If, on the other hand, you want to give other people access to certain parts of your site for maintenance purposes, you can follow the instructions below to create new FTP accounts with cPanel.
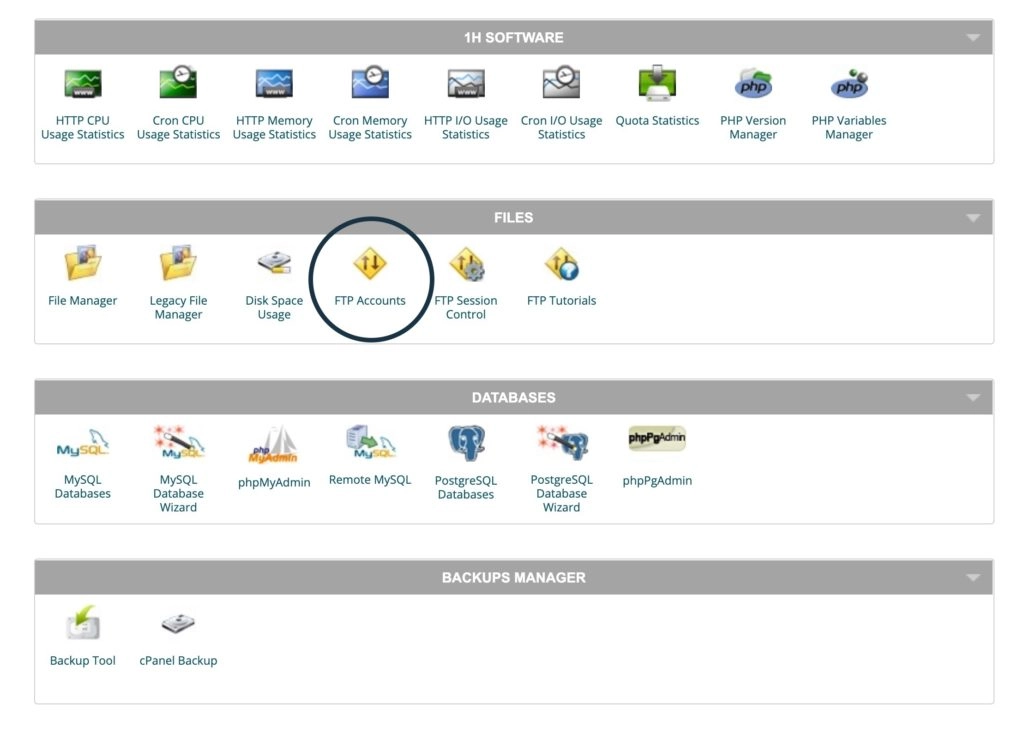
1. First, scroll down to the “Files” section of your cPanel dashboard, then click on FTP Accounts:
2. Type in your choice of username and password:

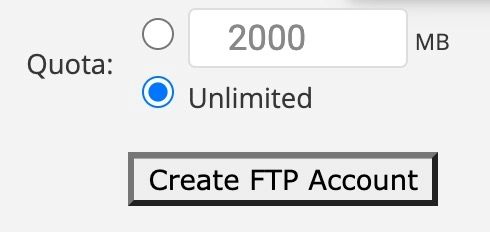
3. Set a Quota as unlimited:
4. Choose the directory you want the user to have access to.
Bear in mind that they will be able to navigate to any subdirectories but not to parent directories. Leaving this field empty will give the user access to your home directory so this is the preferable choice.

5. Click Create.
And that’s it! It really is very simple to create a new FTP account with cPanel. Once you have created the new account, you can provide the user with their login details, along with the server IP address, which will enable them to create a new FTP connection with their FTP client and log in.
Setting Up SFTP with WPEngine

WPEngine only uses SFTP, to provide clients with added security, but the process of creating a new account and connecting to it is much the same as it is for regular FTP accounts with cPanel.
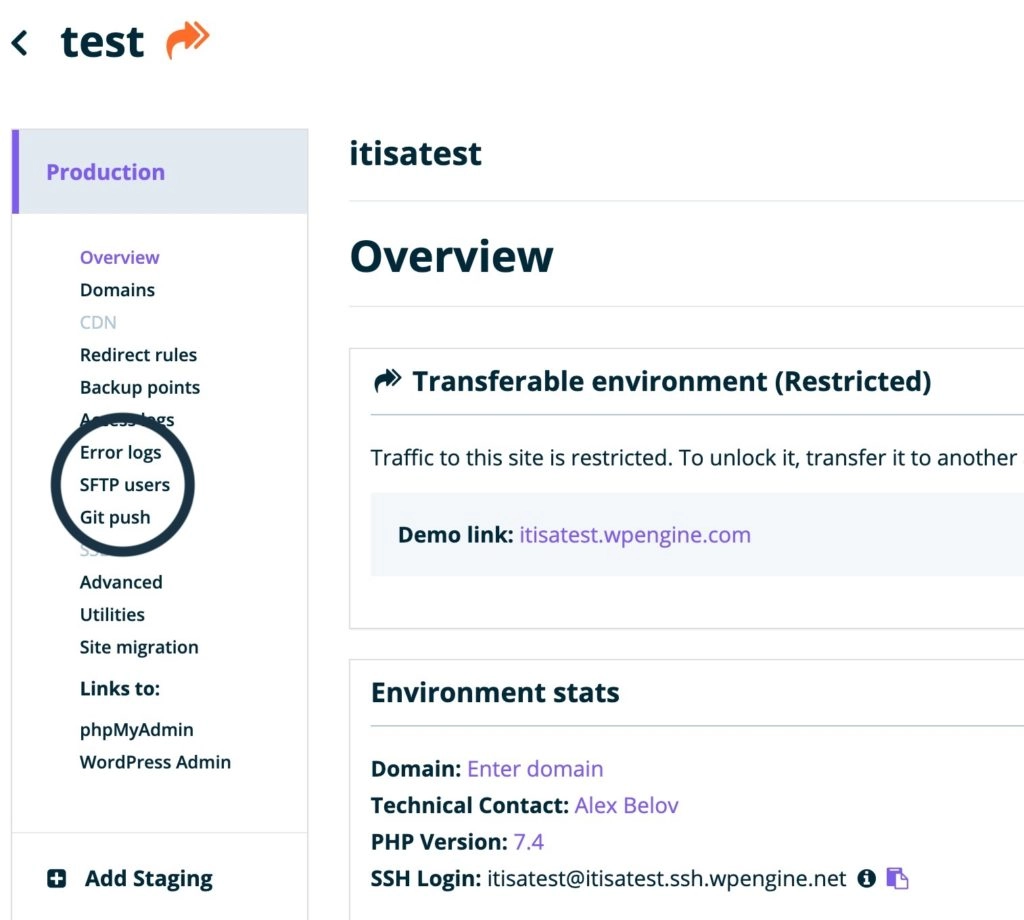
1. Sign into your WPEngine account, then choose your Install (Site) and click on “SFTP Users” from the left menu:
2. Click on Add SFTP User, which will take you to a pop-up form you need to complete:
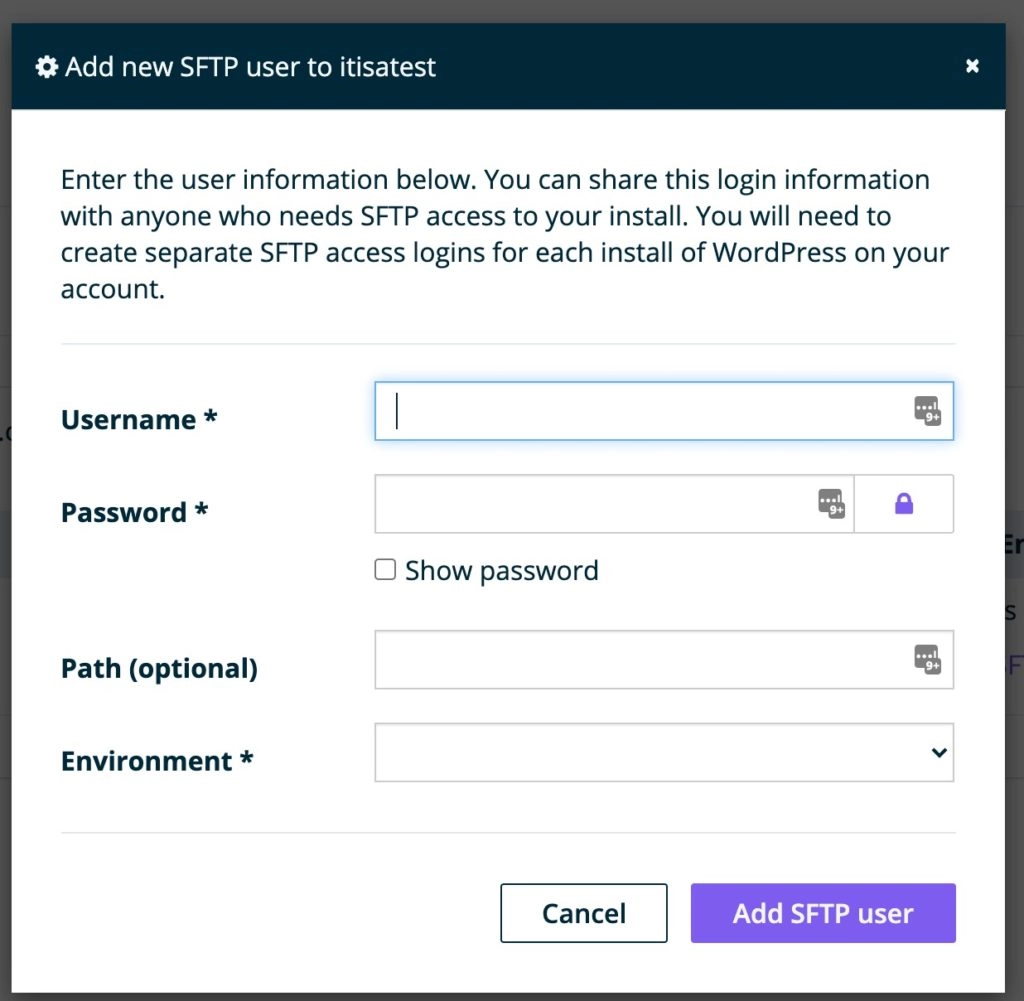
3. Enter username and password in the relevant fields.
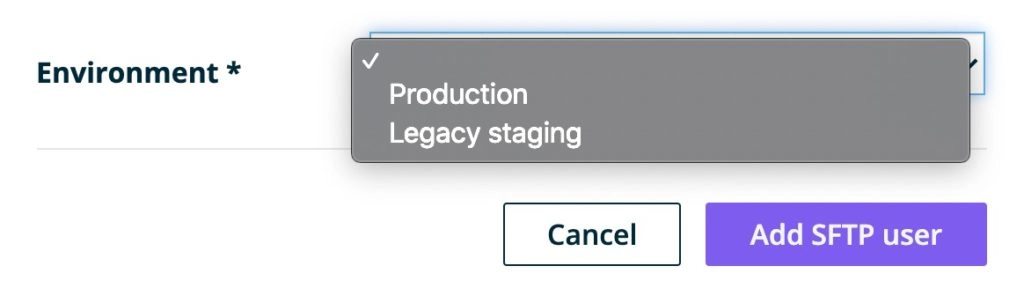
4. Enter a path if you wish (this is optional) and choose a “Production” environment:
5. Click on the “Add SFTP User” button and you’re done.
As you can see, it is a simple process to set up a new account in WPEngine. As with cPanel, once you have completed these steps, you can use an FTP client application to log in to the server. If you are not sure how to do this, refer to the instructions at the end of this guide.
Using SFTP with Kinsta
Kinsta sets up an SFTP account automatically for each domain you add to your hosting plan so you all you need to do is to copy the relevant information into your SFTP client and log in. Simply navigate to Sites from the dashboard menu, choose your site and make sure you are on the Info tab. There, you will find your SFTP username, password, port number and server IP address: all the information you need to connect with an SFTP client application:

Setting Up SFTP with Flywheel
In common with Kinsta, there is nothing you need to do in Flywheel to set up a new SFTP account. Every Flywheel user can log into the SFTP server using their own username and password, which will give them access to the directories in which their site files are kept. The host or server name will be sftp.flywheelsites.com and the port number to specify is 22.
Creating a New SFTP or FTP Connection with Your Client Application
Once you have created a new FTP/SFTP account or located the relevant details of the default account that was created by your hosting service, you are ready to set up a new connection with your SFTP/FTP client. There are many different clients from which to choose (FileZilla, Transmit) but the process to create a new connection is usually quite similar. You simply enter the following information in the ‘Create New Connection’ dialog box:
- Server Name/Host Address – This will either be a URL or an IP address, which will be listed in the appropriate section of your hosting administration dashboard.
- Username and Password – These will either be the name and password you chose when creating a new account or the name and password assigned to your default SFTP/FTP account, depending on whether you are using WPEngine, Kinsta, Flywheel, cPanel or another solution.
- Connection Type – Clients that are capable of using both SFTP and FTP will ask which type of connection you are creating.
- Port – This field is usually optional but if you have been given a specific port number, you can enter it here.
Once you have entered all the relevant information, you simply click on the “Connect” button and your client should log you into the SFTP or FTP server where your site is hosted. If you receive a connection error, double check all the details you entered and if they are correct, refer to your host’s help documentation.


