


You’ve created your product or service, gotten your business plan ready, and your marketing strategy is clear.
But what about your website?
Creating it from scratch can be a daunting process for any size business.
Luckily, WordPress has made it simple and intuitive for those without coding knowledge to develop a professional looking site that attracts and retains customers.
WordPress has also made it easy to optimize your SEO and mobile responsiveness to adapt to today’s digital marketplace.
With WordPress’ ease of use, It’s no wonder why 27% of all active websites are built on the world’s most popular CMS (Content Management System) platform.
WordPress.com vs. WordPress.Org: What’s The Difference
While both web addresses have WordPress in their title, the open source .com and .org versions are completely different from each other and are often confused among first-time WordPress users.
Let’s examine the differences between the two:
1. WordPress.com

If you decide to publish your website on WordPress.com, you are letting them host it for you. The only action item that you’ll need to decide on is choosing a custom domain name, but you won’t be able to monetize it in the long-run. dot-com hosting allows you to choose between five different plans. Here are the five options that are currently available:
- Free – The most limited plan. It is completely free to put your website up and run, but it is not possible to add themes or plugins. This plan also has limited options to optimize your website, and it is not possible to use a custom domain. This is the best plan for those that use their websites as digital business cards and don’t need much functionality built into it.
- Personal – The Personal plan allows for domain customization and comes with email and live chat support. It’s a great option for those that are new to the digital world and are bringing their businesses online.
- Premium – For those that are intermediate coders, the Premium option allows one to unlock design tools, custom CSS, and comes with a built in Google Analytics dashboard. Premium is a great option for those that have built their own freelance business or are solopreneurs.
- Business – WordPress’ Business plan is specifically designed to meet the individualized needs of any business, no matter the size. The plan comes with special themes and plugins, 200 GB storage for a business’ with a growing customer list, and 24/7 specialized live chat support so business owners can get the most ROI from their web presence.
- eCommerce – they developed this paid option to keep up with the rise of eCommerce stores. This option has everything you need to successfully run an online store. The eCommerce plan has built in shipping extensions with major carriers, free and premium payment options, and a one of a kind tax management feature to help save you time and headaches down the road.
2. WordPress.Org

Compared to WordPress.com, by putting your website on WordPress.org, you are hosting your own project. Since you are agreeing to host your own website, the dot-Org version allows you to have much more flexibility on how you want to run your site. If you are looking to monetize your site with ads, WordPress.org is the way to go. Be ready to work hard to get your site up and running because there’s a bigger checklist of tasks that go into building your website on WordPress.org. While setting up your website on WordPress.org is completely free, there are plenty of costs that go into hosting and developing your website.
Here’s how you can develop a website of your dreams:
1. Pick The Right Domain Name
The first step in creating your WP project is choosing the right domain name. While it may seem like a straightforward task, finding the right domain name can be surprisingly complicated. Here’s some tips for choosing the right domain name for your website:
- .Com Is King – According to Verisign, about half of all top level domains (TLD) end their address in .com. If you can, it’s best to choose an address that ends in .com.
- Brand Over Keywords – Don’t worry about SEO when searching for a domain name (WordPress is already SEO friendly anyway). Find a name that is simple and memorable. Concise domain names are always better. Make it easy for customers to remember your brand.
- Long-Term Mindset – It’s important to know where you would like to take your website in the future. Make sure to choose a domain name that is broad enough for your business, while also narrow enough to communicate value to potential customers.
- Easy To Type – If your domain name is difficult to type into the search bar, who will go through the hassle of searching out your website? Make it easy for your visitors to find you. You should be able to also easily pronounce your site name.
- Get Creative – It’s common for people to want to change their company or business name when they realize the domain name they planned for is taken. In that case, it’s time to show off some creativity! Find a workaround or add in “The” to the project name.
2. Set Up Your Hosting Provider
Your hosting provider is where your website will store all of its hard earned data. It’s truly the heart of your project.
A quick Google search will turn up over a hundred hosting providers. There are popular hosting providers such as Siteground, but also more professional providers such as WP Engine and Kinsta. Each hosting provider has its own pros and cons. No matter which one you use, it is important that your hosting provider allows for MySQL version 5.6 or higher and PHP version 7 or higher.
When you have made a decision on your hosting provider, it’s time to go ahead and install WordPress. The majority of hosting providers make it incredibly simple to install WP with the simple click of a button.
3. Choose Your WordPress Theme
Now that you have finished setting up WordPress on the backend, it’s time to start thinking about how the site will look on the front end. WordPress gives you the power to customize your website through its built-in theme options.
The WordPress’ theme library is filled with over 55,000 theme options. It’s important to pick a theme that works best for your business and the type of customers that you’re trying to attract. WordPress allows you to view websites that have used the theme that you are considering. It can be useful to gather inspiration on how your theme can be used to its fullest potential.
While WordPress gives you a default theme, it’s best to optimize your theme. The amount of free and paid theme options that WP provides can be overwhelming so it’s important to take your time choosing the right one.
Here’s a breakdown of some of the most popular themes:
- Loft – If you are searching for an upscale eCommerce layout, look no further. The Loft theme is versatile, but with a built-in team page and call to action buttons, the theme is best for companies that already have team members in place.
- Inspiro – With the recent growth of video content, Inspiro is the perfect theme for any website that is trying to capitalize on the growth of video marketing. Its video lightbox feature allows users to watch your company’s videos without any distractions.
- Mesmerize – This free theme is one of the most popular with WordPress users for good reason. Its multi-purpose design allows you to customize your website to your liking while maintaining the structural integrity of it. Mesmerize is one of the easiest themes to install for those without any prior coding knowledge.
- Composer – Released only a year ago, Composer has quickly become one of WordPress’ most popular themes. The theme has a responsive layout that is ready for mobile and allows you to shortcode your project to get up and running quicker. Composer constantly has worthwhile updates including the new hover feature that was added to the theme. There are 6 different hover styles so you’re bound to find one that works for you.
- Newspaper – One of Premium themes, Newspaper delivers content in an inspiring and customized format. The Newspaper theme is best for any blog or magazine that is looking to eventually monetize their website. The theme has a built-in ad management tool to help you deliver the most impactful ads to your customers.
- Float – As we mentioned earlier, WordPress delivers high-quality eCommerce plans, themes, and plugins to make sure you get the most ROI from your online store. Float is a simple, responsive theme, but highly effective. You can either allow customers to scroll down your page or flip through the sliders to browse your products. The clean, minimal design of the theme lets users get to know your products without any distractions.
- Ascendant – This WordPress theme is great for any kind of project. From blogs to large corporations, Ascendant delivers your high-quality content in a beautiful, responsive layout. Ascendant is able to be easily customized for your needs. It’s a unique theme because you’re able to create a tailored experience for your visitor on each page. For those that are more skilled at WordPress coding, Ascendant comes with shortcodes to speed up the development process and customize your project even more than you originally might have imagined.
Once you have picked your theme, press “Install” and follow the customization directions closely. Every theme has different instructions on how to customize correctly.
4. Add Posts And Pages To Your WordPress Website
No website is complete without multiple pages to learn more about your business. These pages are static, meaning once you write the copy and add pictures or video to the page, the format of the content doesn’t change.
Posts, on the other hand, are dynamic, meaning once you add new content to the page, the new content will show up at the top of the page. Posts are great for blogs, testimonials, and reviews.
If you would like to add a new page, click “Pages” then “Add New”. From there, you’ll be able to add a title to the page and your content below. Be sure to select “Paragraph” if you are adding in copy to your page. Follow these same steps for any other pages that you would like to add to your site.
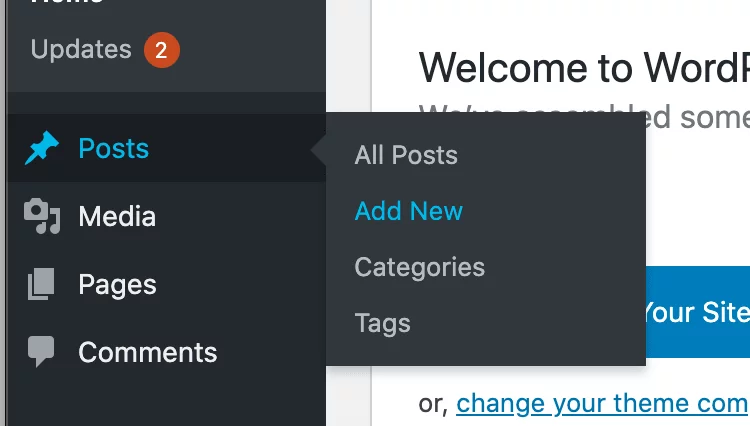
The process is the same for adding posts. Click “Posts” then “Add New”. You’ll also be able to add content and a title to your posts.
Once you have finished creating your pages or posts, either click “Save Draft” to save and continue editing later or click “Publish” for your work to go live on your WordPress website.
5. Install Plugins

One of WordPress’ most unique customization tools is the power of plugins. Plugins add features and enhance overall usability. There are both paid and free plugin options available.
Here’s a breakdown of some of the most popular WordPress plugins:
- Yoast SEO: While WordPress is already designed for SEO, it’s never a bad idea to have a helping hand ranking your project. Yoast SEO is designed to do just that! It has become a go-to plugin for all WordPress sites. Yoast SEO allows you to create quality meta description, connect to Google Site Console, and write SEO-friendly text.
- LiveChat – LiveChat is a must for any e-commerce business or website that is selling products. It allows you to talk with potential customers in real-time while they are visiting it. The paid plugin integrates with most CRM systems and unlike other live chat options on the market, LiveChat doesn’t slow down load time.
- Insert Headers And Footers – There are certainly more exciting plugins, but Insert Headers And Footers is extremely useful for adding in code snippets to your theme. It will save you a ton of time in the long run. This free plugin comes in hand more than you’d originally think.
- Grammarly – Grammar can be a thorn in the side of any website. To make sure that you are putting your best foot forward to potential customers, it’s important to have proper spelling and grammar. Grammarly makes it simple to check for mistakes as well as detect plagiarism. It also alerts you to any vocabulary enhancement opportunities.
- Optimole – This plugin allows you to compress images when you upload them to your website. This allows to not be slowed down by large images. Optimole is a paid plugin that saves you time and headaches while still delivering quality images to your visitors.
- Redirection – Tired of broken links on your website or on your backlinks? For SEO reasons, it’s crucial to make sure your links are up to date. Redirection takes the stress and hassle out of this process by redirecting traffic back to the safety of your website instead of a broken link. The best part about this WordPress plugin is that it monitors the links on your website and automatically changes the URL. The plugin is free and the setup requires no technical knowledge on your part.
- WP Fastest Cache – This plugin is essential for having a fast website load time. WP Fastest Cache allows your data to be stored on your visitor’s browser, which dramatically speeds up load time.
When you want to search for the right plugins, start by clicking on “Plugins”. From there, you will find that WordPress has default plugins. You can check which plugins are currently installed under “Installed Plugins”
If you would like to add new plugins, click “Add New”. You will be able to search from a library of over 55,000 WordPress plugins. Once you have found the right plugin for your website, click “Install Now”. You will be able to add as many plugins as you would like to your website.
6. Customize Your WordPress Website
By now, you’ve gotten a handle on the basics of how to develop a one of a kind WordPress website. It’s now time to go one step further and customize the content that is already on your project that you created within your pages and posts.
Set A Homepage
For your homepage, you can either choose a page (static) or post (dynamic). There’s no right or wrong page to set as a homepage, but keep in mind that this is the first impression that site visitors will get when they land on your site. It’s important to set a homepage that makes visitors want to keep exploring your website and seeing what else you have to offer them.
To set your homepage, go to the WordPress dashboard. From there, navigate to “Settings” then click on “Reading”. Under “Reading Settings”, you’ll see “Front Page Displays.” where you can select either ‘Your Latest Posts” or “A Static Page”. Once you’ve made your selection, click on “Save Changes.”
Change Site Title And Tagline
As we mentioned earlier, WordPress is SEO friendly, but that doesn’t mean that you can’t help search engines out too. WordPress has a default site name, but you’ll want to update your site title and tagline to make it easier for search engines to know what your website is about. This is an often overlooked, but important step for any WordPress project.
On the WordPress dashboard, click on “Settings” then “General”. There you will find “Site Title” and “Tagline”. It’s important to accurately describe the purpose of your website in a descriptive yet concise way. When you’re done, be sure to click on “Save Changes”.
Add In A Navigational Menu
Navigational menus allow site visitors to easily find the content that they are searching for. The last thing any website wants to do is frustrate visitors so adding in a navigational menu is crucial before allowing your website to go live.
Each theme has one or more different options for navigational menus. In the WordPress dashboard, under “Appearances”, click “Menus”. Add a title to your menu under “Menu Name”. You can then select which of your pages and posts you’d like to link to the navigational menu. Once you’re done, click on “Save Menu”.
Allow Comment Settings
Comments are a great way to create a discussion between users and add flavor to your project. Comments can also be great for boosting your SEO, but having too many spam comments can lower the credibility of your website. Allowing users to comment is useful for some websites, while for others, it just doesn’t make sense. WordPress lets you decide whether comments are right for your site or not.
To change your comment settings, go to the WordPress dashboard. From there, click on “Settings” then “Discussion”. You can either allow comments to be posted freely, which in that case do nothing or enable “Comments Must Be Manually Approved”. As your site gains traction and comments are posted, you’ll be able to approve or decline comments made on your site through the dashboard.
Conclusion
Creating your first WordPress project can be an overwhelming task. It’s no wonder why so many businesses dread the process of transitioning online.
However, the opportunity to reach your customers, attract new ones, make a positive first impression, and increase your conversion rate is an impossible opportunity to pass up. WordPress makes it easy to develop your website and be running in no time.


