

Site owners often view having a staging environment as something excessively precautious if not unnecessary and time-wasting. But that belief usually lives until the first serious issue occurs due to a conflict caused by an update.
Imagine you need to make a change to your website – say, install a plugin for WordPress. Your hands are already reaching for the website’s dashboard, don’t they? Well, however understandable your intention is, that’s not the best thing to do – not yet, at least. Because any small update can potentially cause conflicts or even break something.
So, before having anything new on your live site, you need to test your update somewhere. And this somewhere is – you guessed right – a staging environment.
TL;DR: What is a staging environment, and do I really need one?
If I do, how do I create a staging site for WordPress?
What is a staging environment?
In short, this is an exact copy of your site – just not the one users see. Such a site is a sandbox for all the experiments you’d like to perform on the actual live site. A staging site gives you the freedom of trying anything and everything without worrying you may break something.
Of course, your edits and updates can and will affect your site – and that’s the point of a staging website. Before applying changes directly to the production version, you check how that would go. If anything happens, it won’t interrupt your operations or user experience with your site. Besides, you’ll get the valuable experience of doing whatever it is you’d like to try, minus the nerve and time spent fixing errors.
You can also use your staging site for performance testing and the following optimization improvements. Basically, anything you’d like to do on your live site, you should first try out on the staging site – to be on the safe side.
The main thing about staging sites is that they have to be as precise copies of the original live sites as possible. Otherwise, there’s little sense in rehearsing the updates prior to applying them. Even the slightest discrepancy may result in the sites responding to the changes differently.
Do I need a staging site?
We say: better safe than sorry. Having one most certainly won’t harm your live site, while not having one can. But let’s be honest: small blogs and other sites that don’t handle sensitive information can survive occasional errors and some downtime.
Things aren’t so simple with bank sites or giants like Google: those require a much more careful attitude. But if your site is a small blog or a portfolio showcase, building a staging site for it may not be worth the effort. In this case, we can recommend either making peace with the possibility of your site being unavailable if anything goes awry or looking at the not-so-time- and skill-demanding options.
Having a staging environment has hardly hurt anyone in the entire history of the internet. But, to be fair, smaller sites can survive without it.
Ask yourself: is it okay if your site is down for a couple of hours once in a while? If the answer is yes, you can do without a staging environment.
Benefits of using a staging environment
1. Last-minute bug fixes
One positive effect of staging before pushing to live is keeping the site operations uninterrupted. But that’s just the surface; scooping deeper, you see that it also gives you an extra step for all your final checks. Even though transferring your updates to the live site is often a matter of a click, it’s still a step, and your brain treats it like one. After applying all the changes to the staging site, you scan the whole thing one more time – and that can help you identify the blank spots on your beautiful code canvas.
2. Testing without risk
Remember times when you were going to update something and, sweating and holding your fingers crossed, hesitated to click Update? “Gosh, I hope I did everything right, and nothing’s gonna break!” If you stage before applying anything to your site, you’ll feel more secure about such things because you’ll have it all tested somewhere safe. The most damage you can do is to break your staging site with no user data depending on it.
3. Sandbox for new things
This advantage stems from the previous one. Since you can try anything on a staging site, you feel a lot more freedom playing around with it. Having this site hidden from the public eye, you can let all your creativity unfurl. Practice the new cool tricks you just learned, add all sorts of fancy effects, meddle with your WordPress Theme Editor (no, we don’t recommend that – for many reasons, but if you feel an itching necessity – there’s your staging site)!
Drawbacks of using a staging environment
1. Time spent on staging setup
Sometimes, you may feel like it’s just not worth the while and decide to skip the step of staging. Here, you need to understand whether it’s the voice of laziness speaking in you or your site doesn’t require that kind of precaution. So, try to see the difference between not needing and not wanting.
The time saved by not building a staging site can quickly be eaten up by the time spent fixing the errors.
2. Staging site limitations
Even though a staging site can be a perfect clone of the live site, it can’t imitate the external conditions for you. For instance, stress testing a staging site can be tricky. If you have a big enough site that handles huge amounts of data, your staging must fit the scale. Experts say a staging environment has to have at least 60% of the resources of the original site to make the stress test results applicable. That results in your staging being either quite costly or unfit for the purpose.
Such limitations are a debatable disadvantage because having no staging environment limits you even more. It’s somewhat similar to saying: “These boots are too thin for winter; so, I’ll just walk barefoot then.”
Disclaimer
Once again: if potential discontinuity of your site operation is no concern, then you don’t have to bother. However, keep in mind you may very well have interruptions since a freshly made site is a desired target for all sorts of hackers. On the flip side, though, you’ll save yourself some time or money (or both).
Now, if you decide you need a staging environment, let’s see what options you have.
Option 1: When money is a concern
You can create a staging environment yourself. It may seem like a big deal for a non-experienced user, but it’s not too bad.
Generally, the web development process has four active stages:
- Local
- Development
- Staging
- Production
Ideally, all four steps of your work on the soon-to-be site should take place in four different environments: your computer (local), development environment (work process), staging site (your try-out site), and the actual live site where you have the project at the production stage.
For smaller sites, it’s reasonable to identify the two main types: production and pre-production environments. That’s the least number of steps you need to take. That way, the first three steps merge into one and develop everything in one environment. The question is, should it be a local environment or some staging online?
Developing locally vs. on a staging site
So, you don’t plan on having both a local and staging environment. How do you choose?
The local environment usually implies building the base of your site (markup and basic styling), while the staging comes into play for more complicated development. That’s because developing locally means developing offline. This should bring your thinking process down to answering the following questions:
- Are you 100% confident in your or your teams’ development skills of building things intended to function online in an offline environment?
- Are all people involved (e.g., you, your client, etc.) ok with having the site live right away before everyone contributes their corrections?
- Is creating an online staging environment a significant complication to the process?
If you got Yes for all of the three, you’re good to go with a local environment. If, however, you have at least one No for any of the questions, we suggest you reconsider getting a staging site instead or additional to the local environment.
Hosting on your own computer
There are multiple tools to help you start building a site hosted on your computer. A great one for WordPress would be LocalWP.

To work with it, you need to:
- Download and install LocalWP.
- You may get a few notes from your security app (Windows Defender is known to get too excited about LocalWP) – that’s ok, click “Allow access” on those.
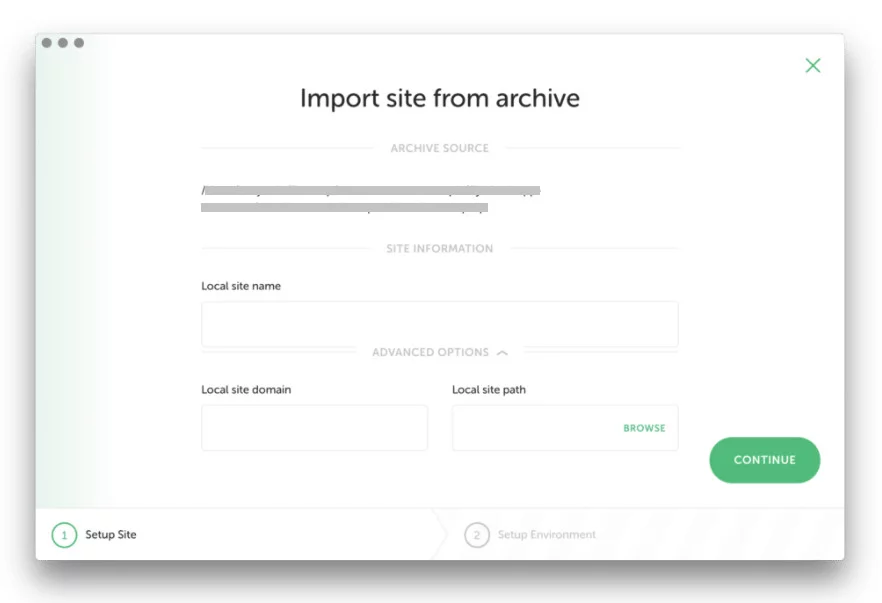
- Import an archive containing your site’s wp-content folder and the database dump as an sql file.
Or, if you don’t have a site yet, you can create one within this app. To do so, continue with:
- Checking the settings offered for you (if you’re a beginner, it’s safer to go with the default options).
- Provide your WordPress admin credentials.
And there you go, you can start building!
P.S. For more instructions on the specifics of LocalWP, you can check their documentation and helpful materials.
As compared to shared hosting options, dedicated hosting can offer you more confidentiality. To begin with, you know there’s only your site on the server. Ergo, the load will be much more predictable. Some of the shared hosting providers from the lower price range promise you this much of the bandwidth but then decide to earn some more money and squish a dozen more sites on their servers. Logically, that deprives you of your resources and leaves you quite unhappy. When you’re your own hosting manager, that won’t be a problem.
The downside
The downside is that it has to be always up. Hosting a site yourself is always 100% your responsibility. It may not be as much of a burden with a staging site as it is with a live one but still something to bear in mind. So, you’re the one to make sure a cat doesn’t pee on your hardware and hackers don’t destroy your work or deprive you of access to it (and everything else on your computer, if you host your site on it).
Speaking of the hardware: it should be capable enough to be always up – or at least when your works require it. A good workhorse of that kind can be costly. Also, maintaining a server in a working condition means feeding it a lot of power. So, in all fairness, you won’t have it for free, but it may be less pricey.
Option 2: When time is a concern
Kinsta-based staging environment

If you already have a website hosted on Kinsta, creating a staging site for it will be a matter of a couple of clicks – literally.
- Go to your MyKinsta dashboard and open the Sites tab.
- In the list of sites you see, select the one you need to stage.
- Click the Change environment button and select the Staging option.
- You’ll see a staging environment if you already have one, but if you don’t, the screen will show you the Create a staging environment option. Click it and sit back, waiting for Kinsta to do it for you. The process should take around 10-15 minutes.
Once you have a staging site ready, you can play around with it and test all your daring ideas. If you’re happy with your updates, you can push them to live in a single click.
Note that the Push to live function overwrites your entire live site with its databases and everything. So, be careful doing it: perform the transition in the low-traffic hours and keep a competent expert nearby just in case. Even though you’ll have a backup of your site automatically created right before you push the changes, it’s still better to be ready.
Every site hosted by Kinsta gets all these options included in the plan. One more reason to choose a reliable provider and put up with a higher price: it’s always about getting what you paid for.
WP Engine-based staging environment
Another great hosting provider – especially for WordPress sites – is WP Engine. It also provides a handy way to create a staging environment – and development environment, too – for any site hosted there.
With WP Engine, you go about creating a staging site much like with Kinsta:
- Go to the WP Engine user portal and open the Sites page.
- Select the site for which you’d like to have a staging environment.
- Find the dropdown at the top right part of the screen. It should have the name of your currently used environment and a three-letter label left of it. If you have no staging environment yet, your label should say PRD (production).
- Click Add staging environment in this dropdown and fill in the setup information.
- Wait for WP Engine to get your staging site ready.
Everything is neat and painless and requires almost no effort and just a bit of time. WP Engine’s top-tier plans even allow selecting the staging site’s domain name (the rest just have one assigned to the staging).
If you’re still debating over the hosting providers for your site, here we have them compared. There are both Kinsta and WP Engine and a couple of other market big players – most likely, those were your primary options, so, the post might be quite helpful to make a choice.
+ LocalWP is designed to pair with WP Engine sites and allows pushing your changes to live almost effortlessly. So, if you made up your mind on WP Engine and decided to use a local environment, too (which is a good practice), LocalWP would be a perfect choice.
Any other provider?..
Other hosting companies often provide one-click staging environments, too – it’s a popular option. If you’re planning to create a staging site this way, check if your plan includes it or how much it will cost as an additional option. Maybe you’ll find the following option a better choice: we collected some helpful info about the most popular hosting providers.
Option 3: When you just want to have it done
Building everything manually from scratch is certainly a marvelous exercise that’ll bring you a priceless experience. But let’s admit we don’t always want to get our hands dirty with development, especially if that’s not necessary. Can’t WordPress offer any no-code option?
Yes, it can! With all the plugins out there, how could it not?
If you don’t feel like doing the work manually and don’t mind paying some 50 bucks, give or take, there’s quite a selection of plugins to help you. To find one, you need to search clone in the search bar in Plugins → Add New. Most likely, the options that offer to clone or migrate your site will do the trick.
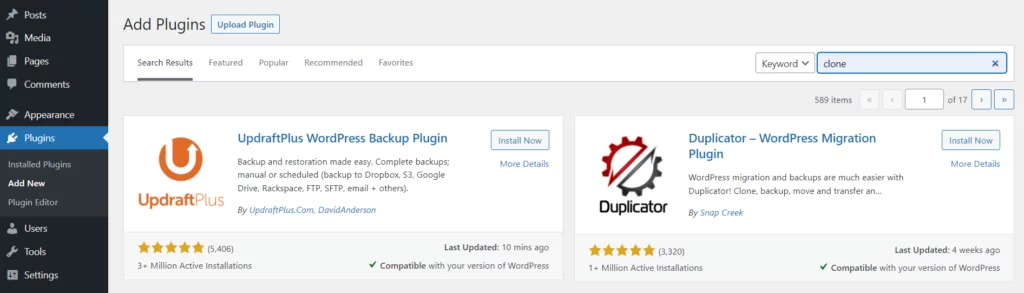
You can select plugins like Duplicator Pro or UpdraftPlus Premium. For the money you pay – and the price falls somewhere in the range between $30 and $70, depending on which option you buy – you get your entire site cloned with every WordPress entity you had. And it’s a matter of only a few clicks and a couple of minutes – sweet, isn’t it?
Note: These plugins can also help you with other tasks like creating backups or migrating your site. However, they might be overkill for backups. If you need to back up your site, here are a few solutions.
Things to take into account
- Use your staging environment to identify and eliminate any bugs, errors, and other potential problems – but don’t forget to check the live site, too, once you push the changes! Something could have slipped your attention or simply not showed up on the staging site. And, since we came to this, …
- Keep in mind your staging site will probably not be an exact replica of the original with every single thing implemented the same way. Even if it’s also online and on the same hosting.
- Pushing to live will most likely rewrite your site completely. That includes all the databases – with clients’ information, too.
- Going with a staging site is a much more reliable way. With all the modern options of creating one in a few clicks, there’s hardly a good reason not to do so.
BDA to the rescue!
Some issues are hard to fix even if you have all the time in the world and a staging environment in place. Looking to resolve problems with your WordPress site? We can help you with it! Our team can clear all the unwanted bugs and errors off your site and keep it that way afterward. Contact us to get your maintenance plan set up, to have something fixed ASAP, or with any other request you have in mind regarding your WordPress site: we’re there for you to make it all work like it’s supposed to.


